
What Equipment do you need for a DSLR Camera Trap?
- Dawn McCall
- Jun 19, 2022
- 4 min read

Introduction
I first started camera trapping in 2018 in my parents garden. At that time there was limited information on DSLR camera trapping available. Now camera trapping has become more popular and there is a bit more information and company's available for people who wish to take up this technique. This has made it easier for many people to add camera trapping to their toolkit without a lot of effort.
The purpose of this blog is a bit of a guide for people starting out.

Above: Grey Squirrel captured with my first camera trap in my parents garden
Camptraptions Sensor, 1 flash F8.0| 1.0 Sec | ISO 400
What is Camera Trapping?
A camera trap is a camera that you set up and is automatically fired when the subject is detected. The camera then takes a photograph or video clip. A camera trap consists of a camera, sensor and a light source to light the subject in the darkness.
Why Camera Trap?
Camera Traps are an excellent way of getting photos of rare and shy species. They are also great for nocturnal species which you won't normally see. Camera traps also allow you to get great wide-angle images of animals in their environment, these types of images show a different and more intimate perspective.
Equipment
Camera & Lens
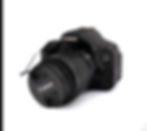
The Camera
I am using a Canon 600D or Rebel T3i as it's known in North America. This is mainly because I upgraded my main camera to a 80D so it wasn't doing much, but any DSLR camera will do. It is better if your camera is cheap but reliable and can hold it's charge while in sleep mode.
Lens
Wide-angle lens are good for camera traps. This is because it can create a more intimate perspective, with the animal in it's environment. I have two lens which I use for camera trapping. The Canon kit lens 18-55mm and the Sigma 10-20mm.
Flash & Triggers

Now we have a camera we need to light our subjects. For this I use two flashes. One is a Canon Speedlite 580EX which is a great flash for camera trapping. This is mainly because it fires the first time the camera is triggered unlike my other flash (Canon Speedlite 430EX ii) which only fires the second time the camera is triggered so for this reason it is always my secondary flash.
So when choosing which flash to use it is best to have one which fires on the first trigger and holds it's charge. One flash that is quoted a lot when camera trapping is the Nikon SB-28 for this reason but these are hard to come by as they are no longer made. The ones that are still around are second hand and are mostly knackered. There are other flashes to call on which are designed for camera trapping like Will Burrard-Lucas's of Camtraptions F1 & Z1. Camtraptions also have these wireless Triggers which are great when put with the Ni-MH Rechargeable Batteries. Wireless is great as it allows you more movement without being constrained by wires.

The sensor
The senor is a key piece of equipment and you have two main opinions to choose from: PIR or Beam. The Image above shows the different type of sensors available. On the right we have two types of PIR sensors. PIR is a single device which is triggered by movement and heat while on the left is a beam sensor which is two devices with a laser that goes from one to another. When the subject passes though and breaks the beam the camera is triggered to fire.
Choosing the right type of sensor
When it comes to choosing your sensor it pays to think what you plan to be photographing and where? PIR sensors are good if you don't know which way your subject is coming from and have a good range of view but this can be shortened by applying a snoot or using shutters like on the Camptraption one. The down side is they can be not very accurate and prone to having many pictures of waving grass and trees in bad weather. On the other hand we have the beam sensor which is good for on animal trails when you know where your subject is coming from. The beam sensor is only triggered when the beam is broken so it is more accurate and doesn't have false fires because of the wind or sun like the PIR. The down side is that it is harder to set up and costs more.

Above: Red Squirrel Composite taken in Scotland
F11| 1/200 Sec| ISO 1600 PIR Sensor with two flash
Now we have gone through the three main bits of equipment camera, lighting and the sensor we now come to the other bits. These include protection for are equipment, stands for are lights and camera. A Trail Camera is also good so we can see what wildlife or people are there before we put out are more expensive equipment.


Here we have Cognisys Camera Control box but if you are just starting out you can easily make you own. My first camera box was made from a Pelican Case with a pipe stuck on the front or if you want an even cheaper way a plastic bag with string tired around the bottom will do the trick. My flashes are in food containers which I have painted but a plastic bag will work just fine too. Then we need something to mount our equipment on. I've made my own poles out of broom poles and stuck a mini ball-head on the end. If you don't want to make your own you can easily use tripods and light stands.

Above: Wisedry Silica Gel bags
When you put your camera outside a problem you may encounter is condensation on your lens or inside your box. This is bad so a tip is to use some little white packets which are shown in the above pictures. These are silica beads which soak up any moisture in the air. This help protect your camera and future images from damage. I use wisedry reusable bags which change colour when they get wet. All you do then is put it in the microwave for a few minutes and you can reuse it again.
Hope this helps anyone who is thinking of trying this out. If this was helpful please join me in my next post where I show you how to set your equipment up in the field.
Thanks for reading if anyone has any questions about this please don't hesitate to contact me through my contact page.